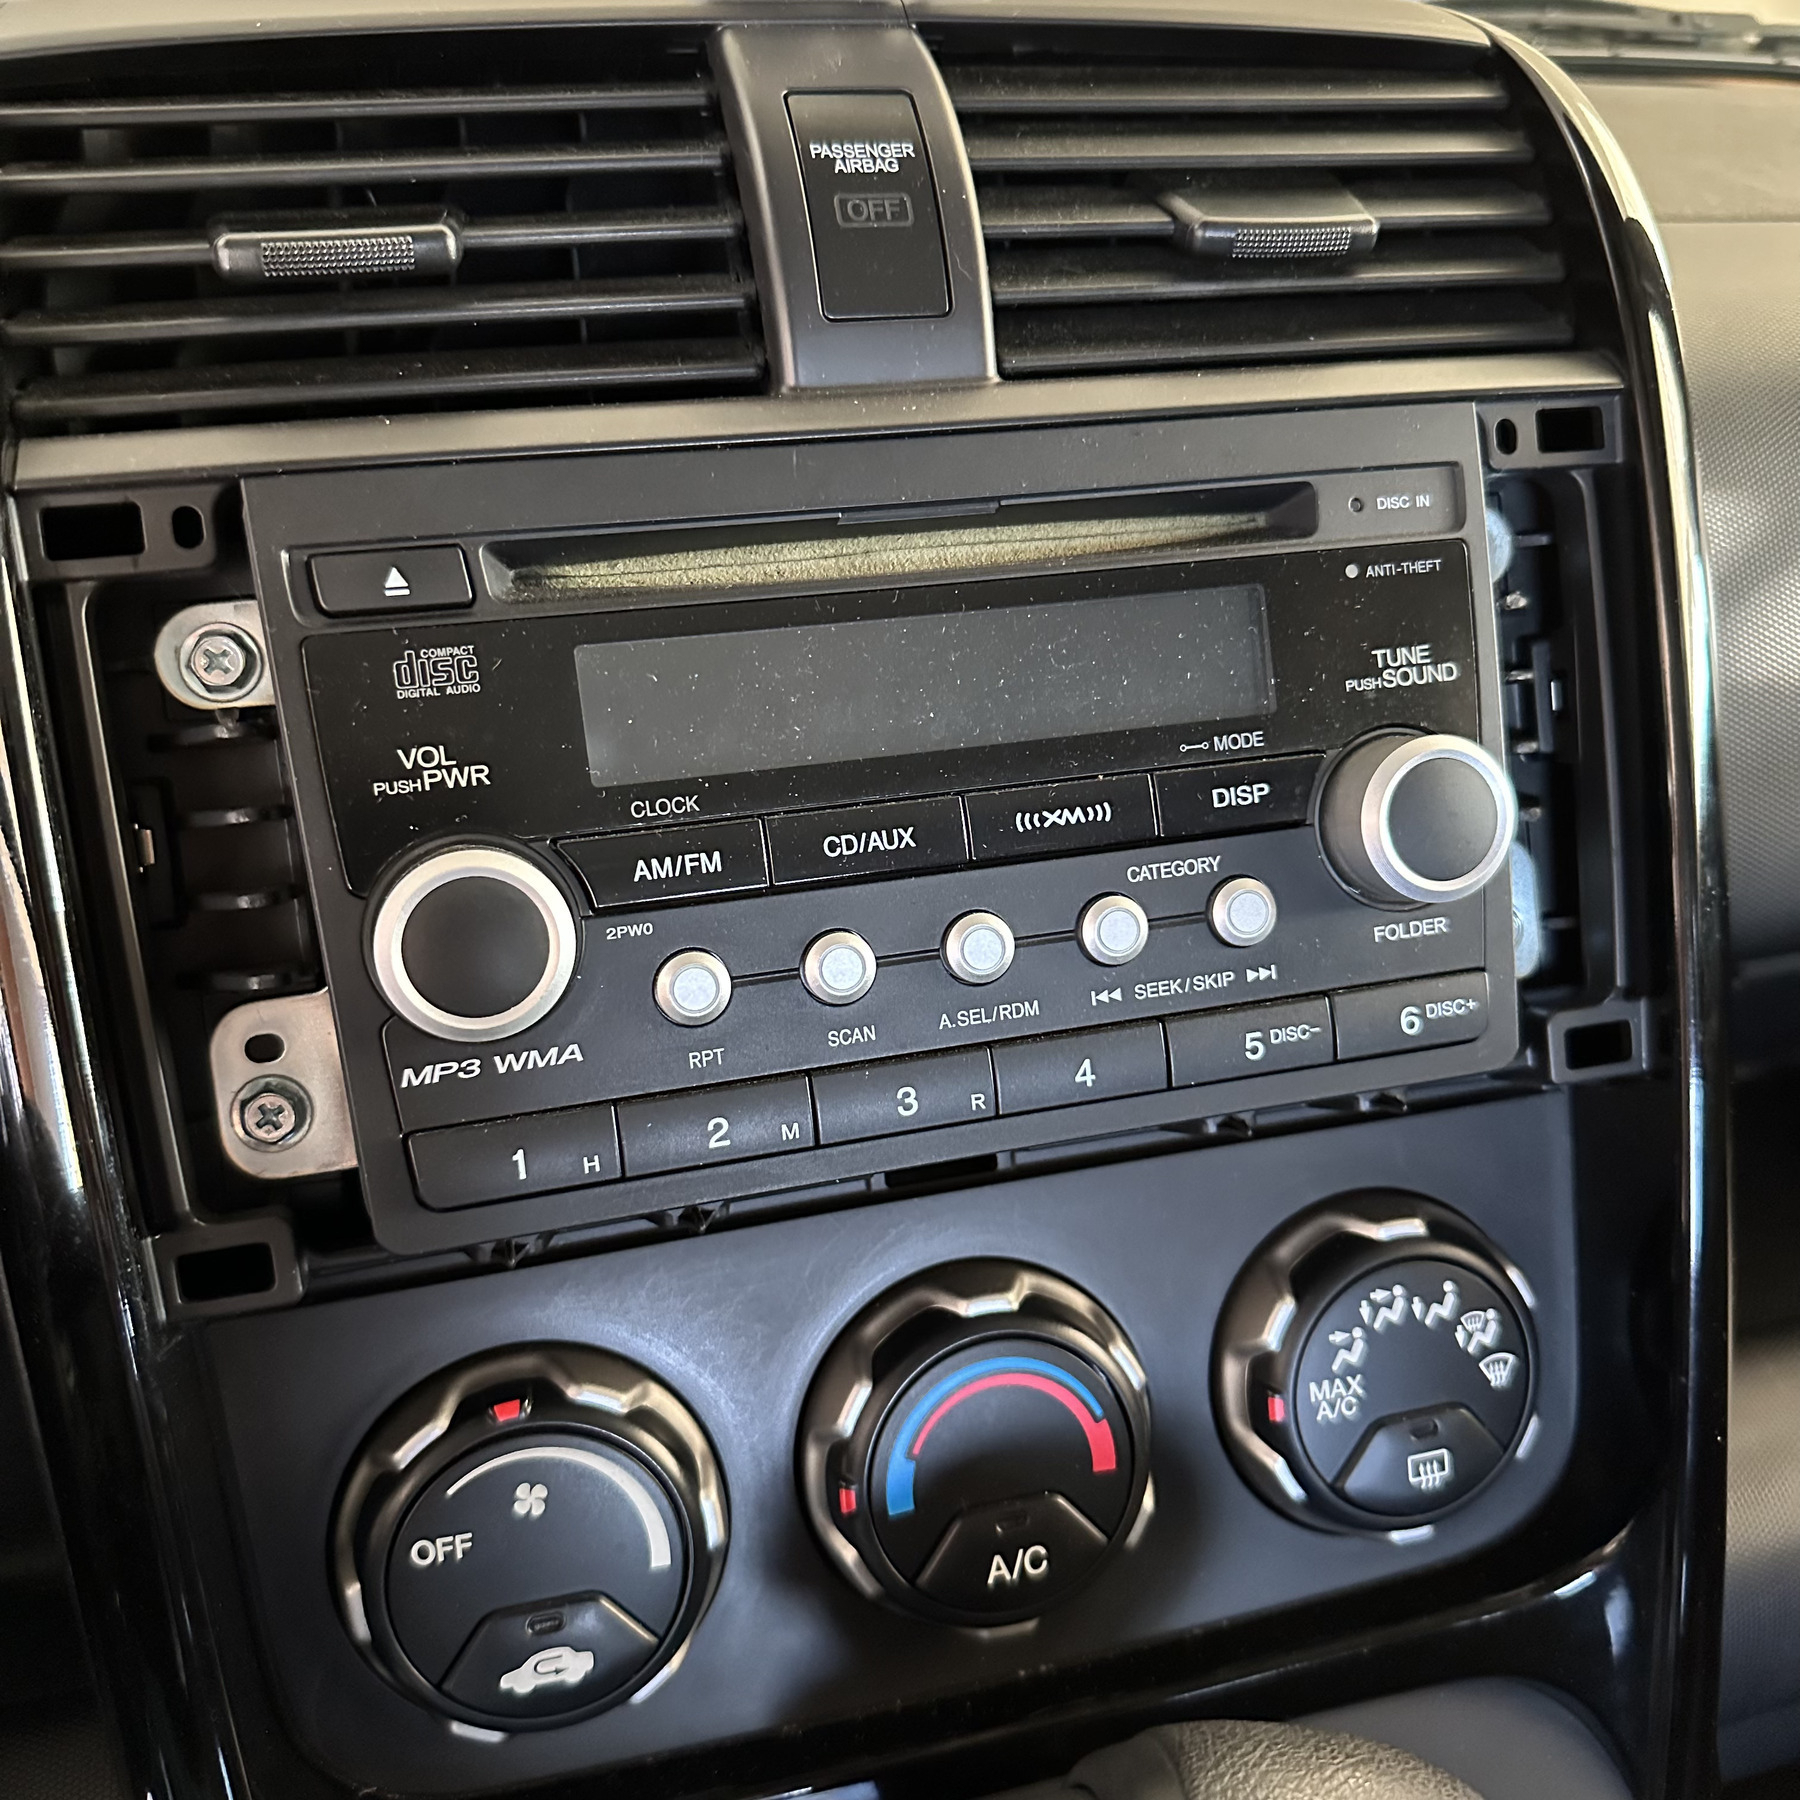
There are a bunch of things I want to add to my Honda Element to make it my own. I just finished the first upgrade: CarPlay. I didn’t really know what I was doing but somehow stumbled through it. It is a huge improvement compared to the 15-year-old factory radio.
Documentation online is a little inconsistent for this kind of upgrade. I wasn’t totally sure if the parts were correct until they arrived. In the end I used these:
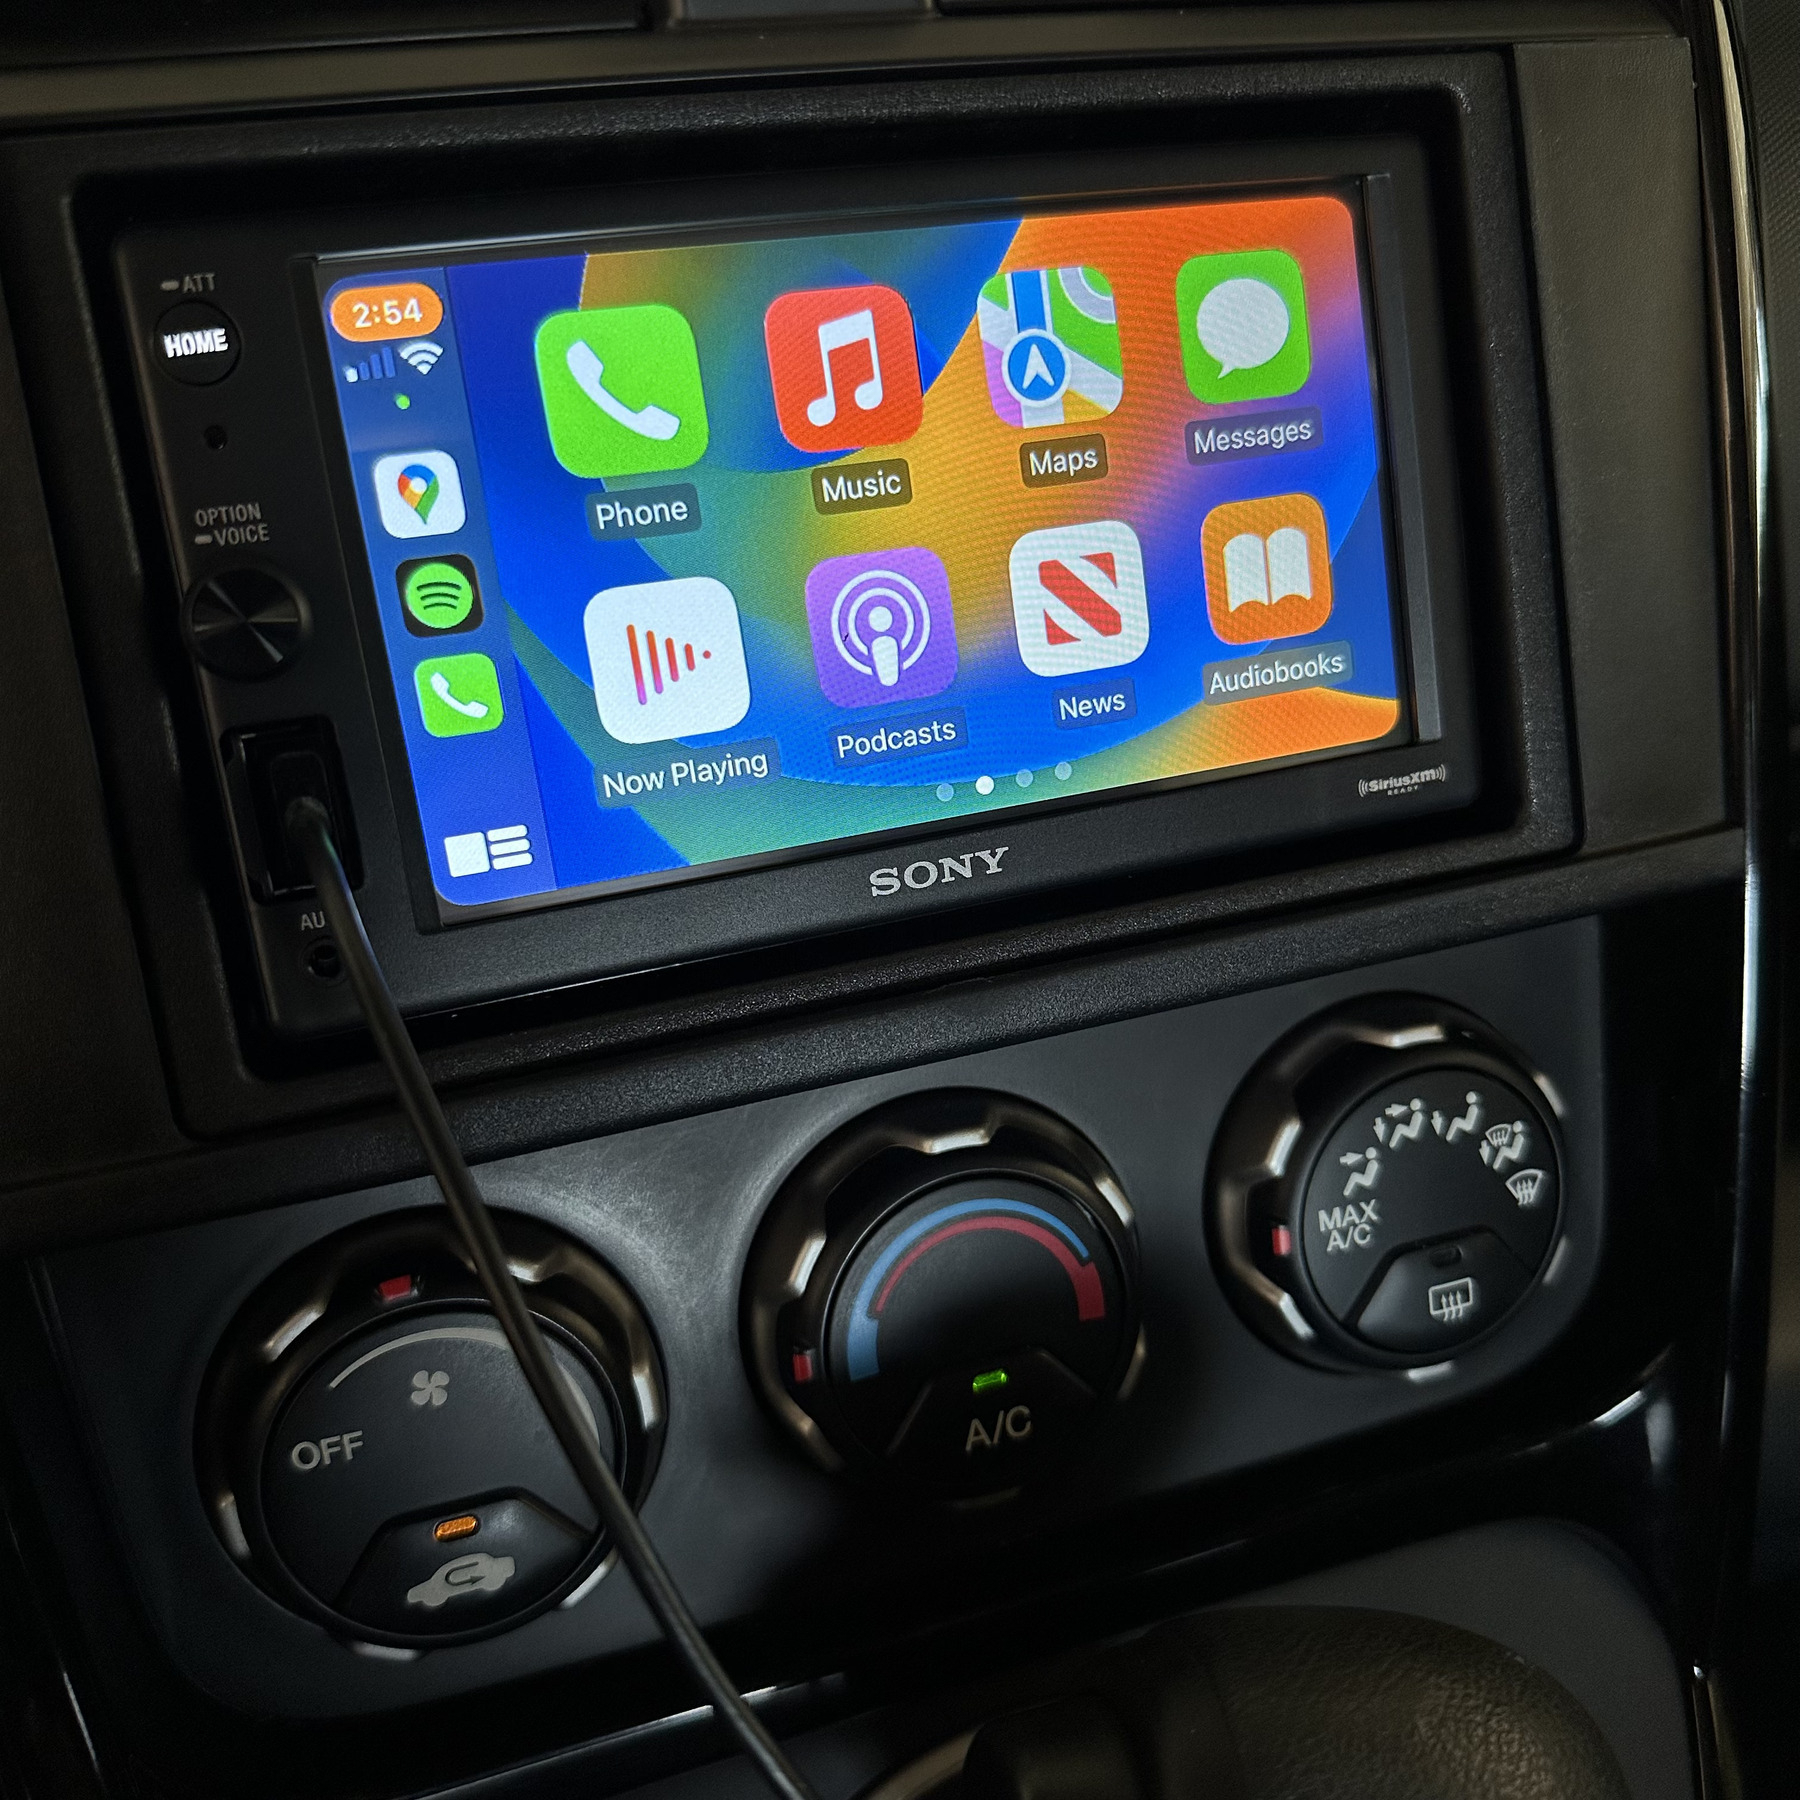
- Sony XAVAX1000, 6.2-inch media receiver. Simple, clean design with an actual knob. I think it’s discontinued but Best Buy had one.
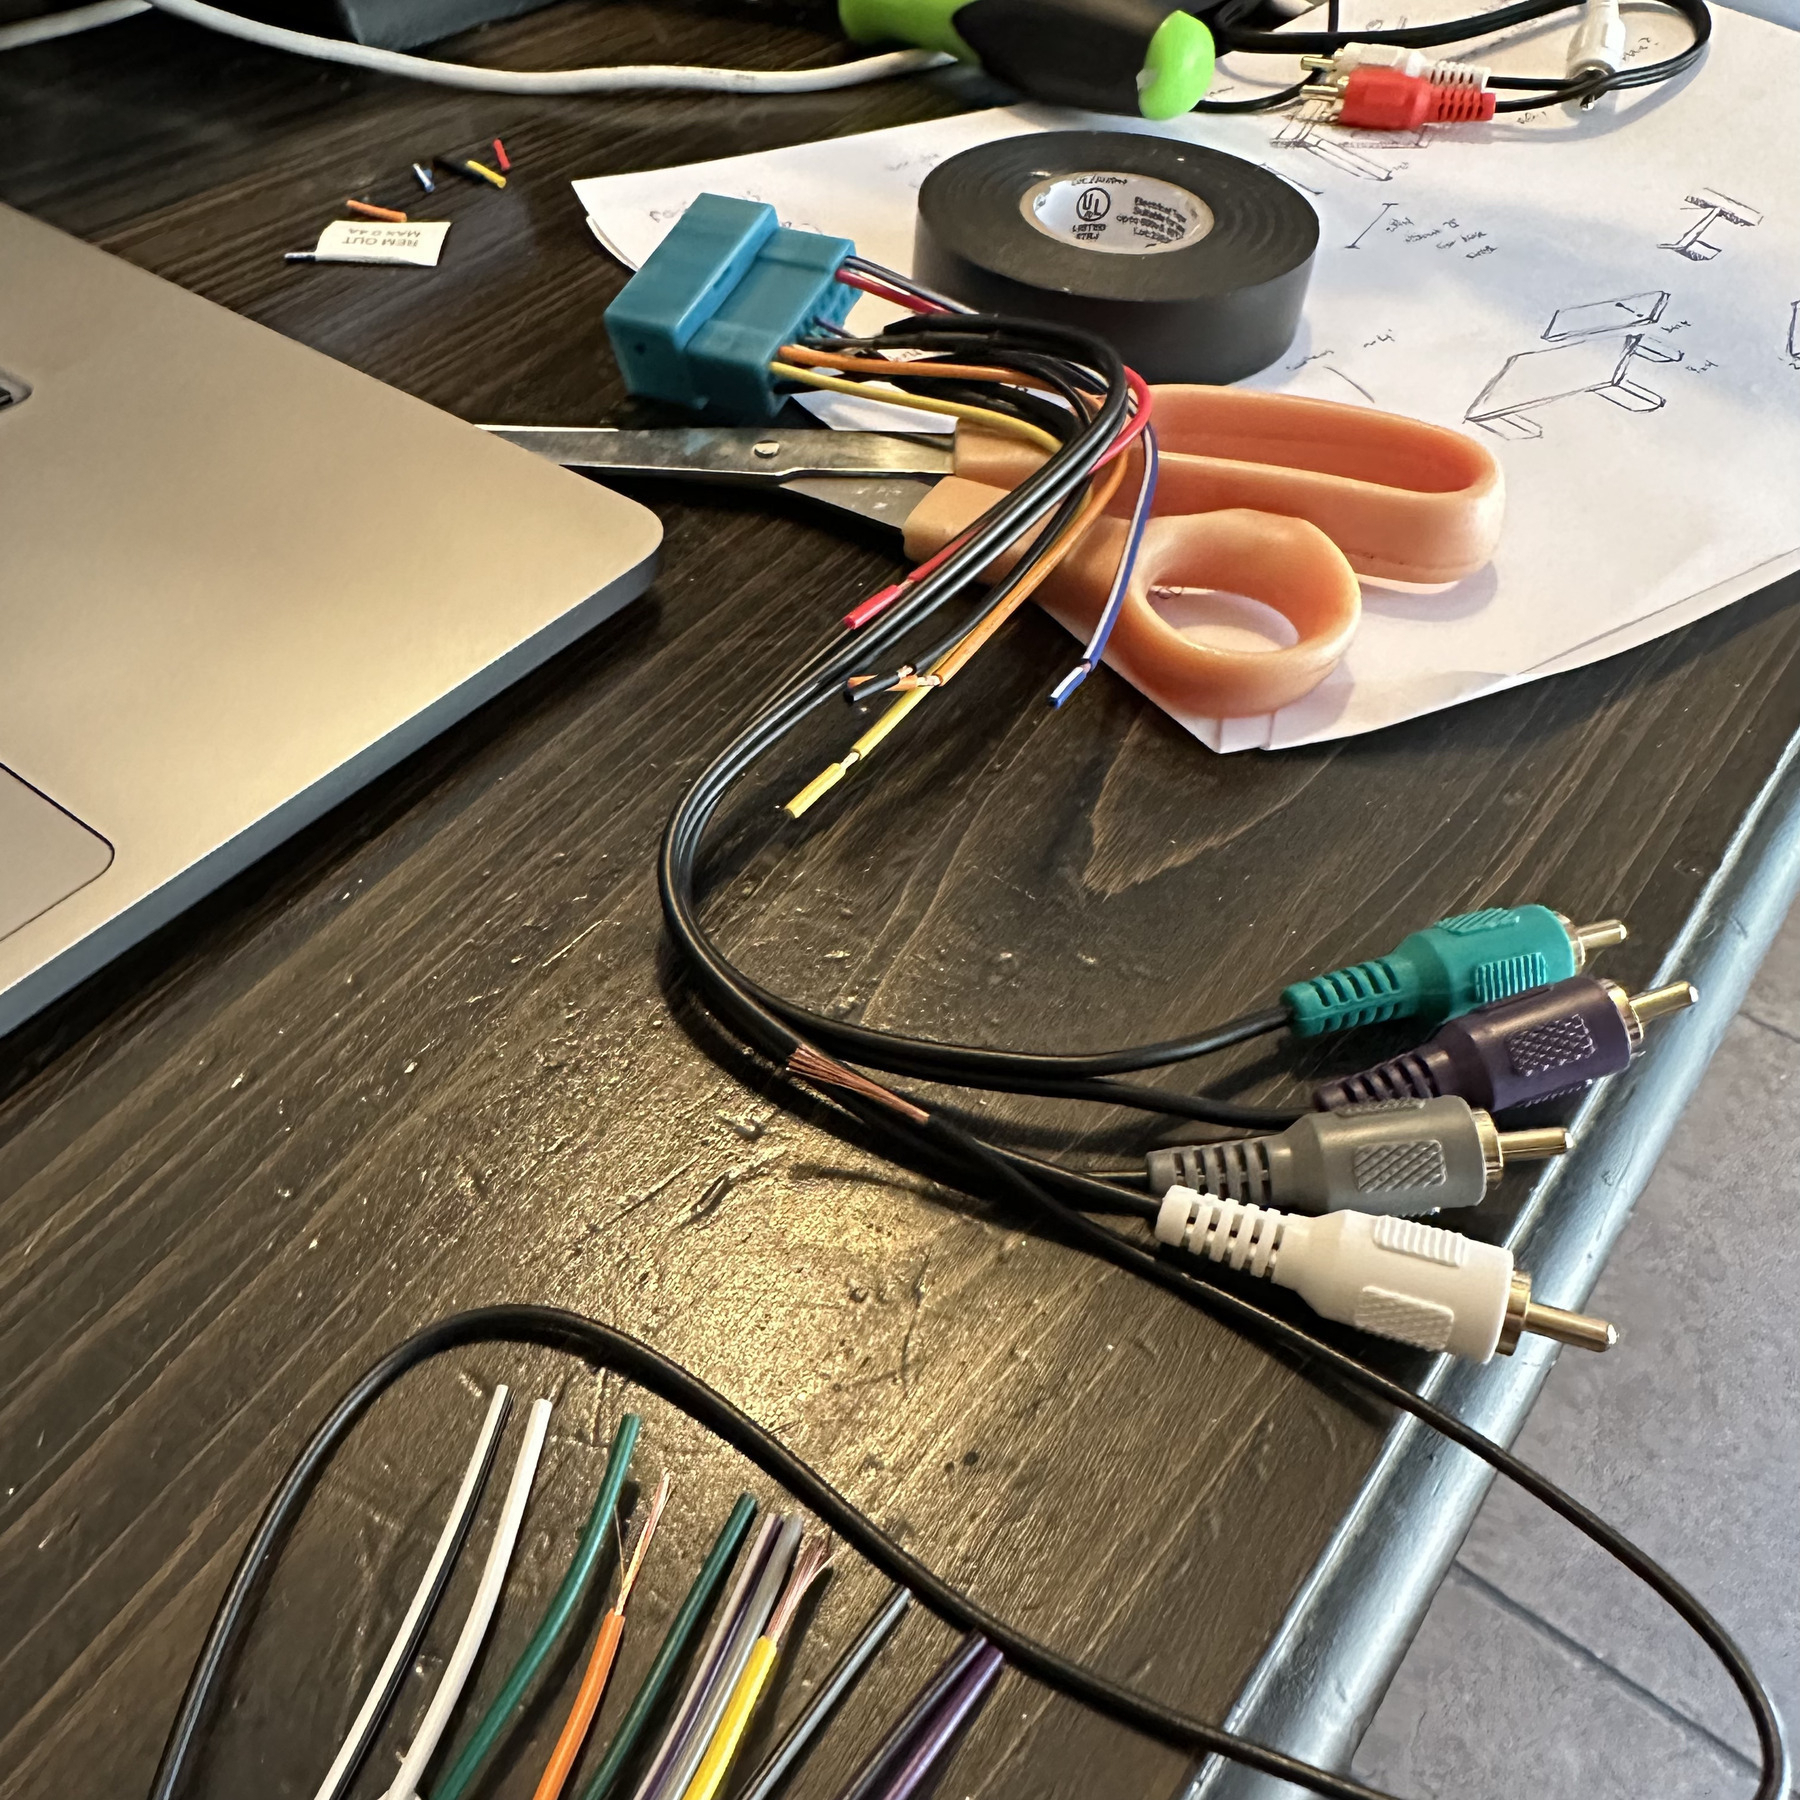
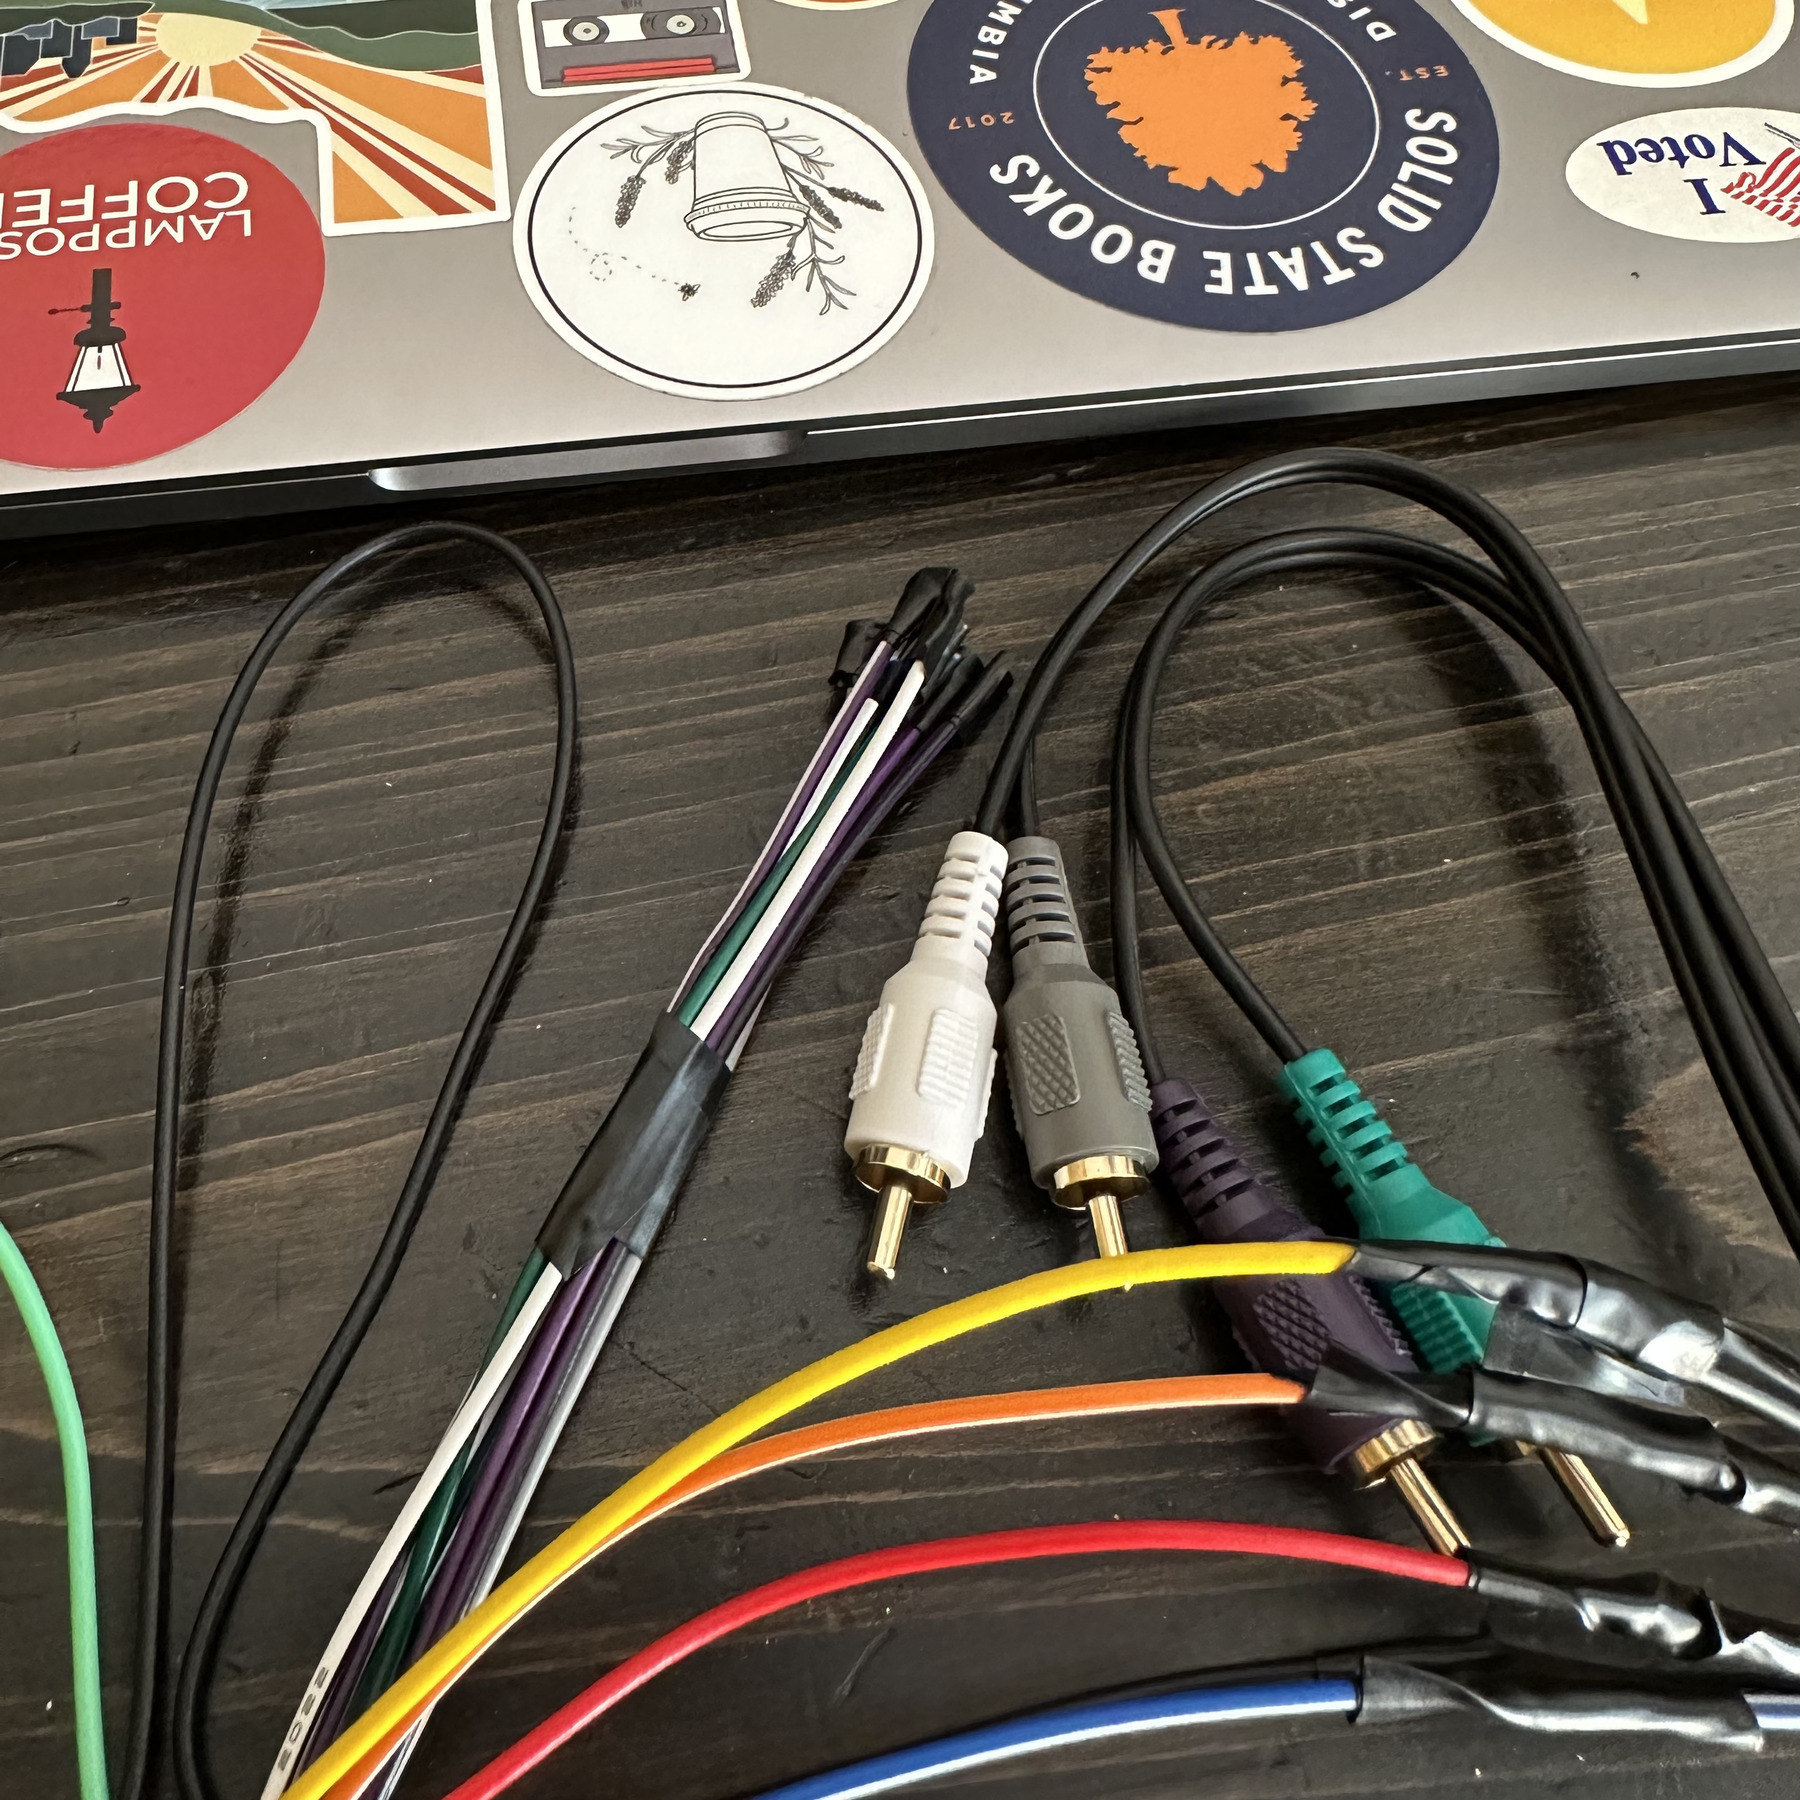
- Metra 70-7863, stereo wiring harness. With RCA cables that go to the Sony unit. Ordered the wrong kit at first, then found the right one at Custom Sounds in Austin instead of waiting for shipping.
- Metra 95-7863, plastic dash kit. I was honestly shocked when this arrived and it was the right shape. It was hard to tell from the online photos.
If you are reading this in the future to upgrade your own car, note that I have a 2008 Honda Element SC. I don’t know if these parts would work perfectly with earlier or later models, or the EX or LX trims.
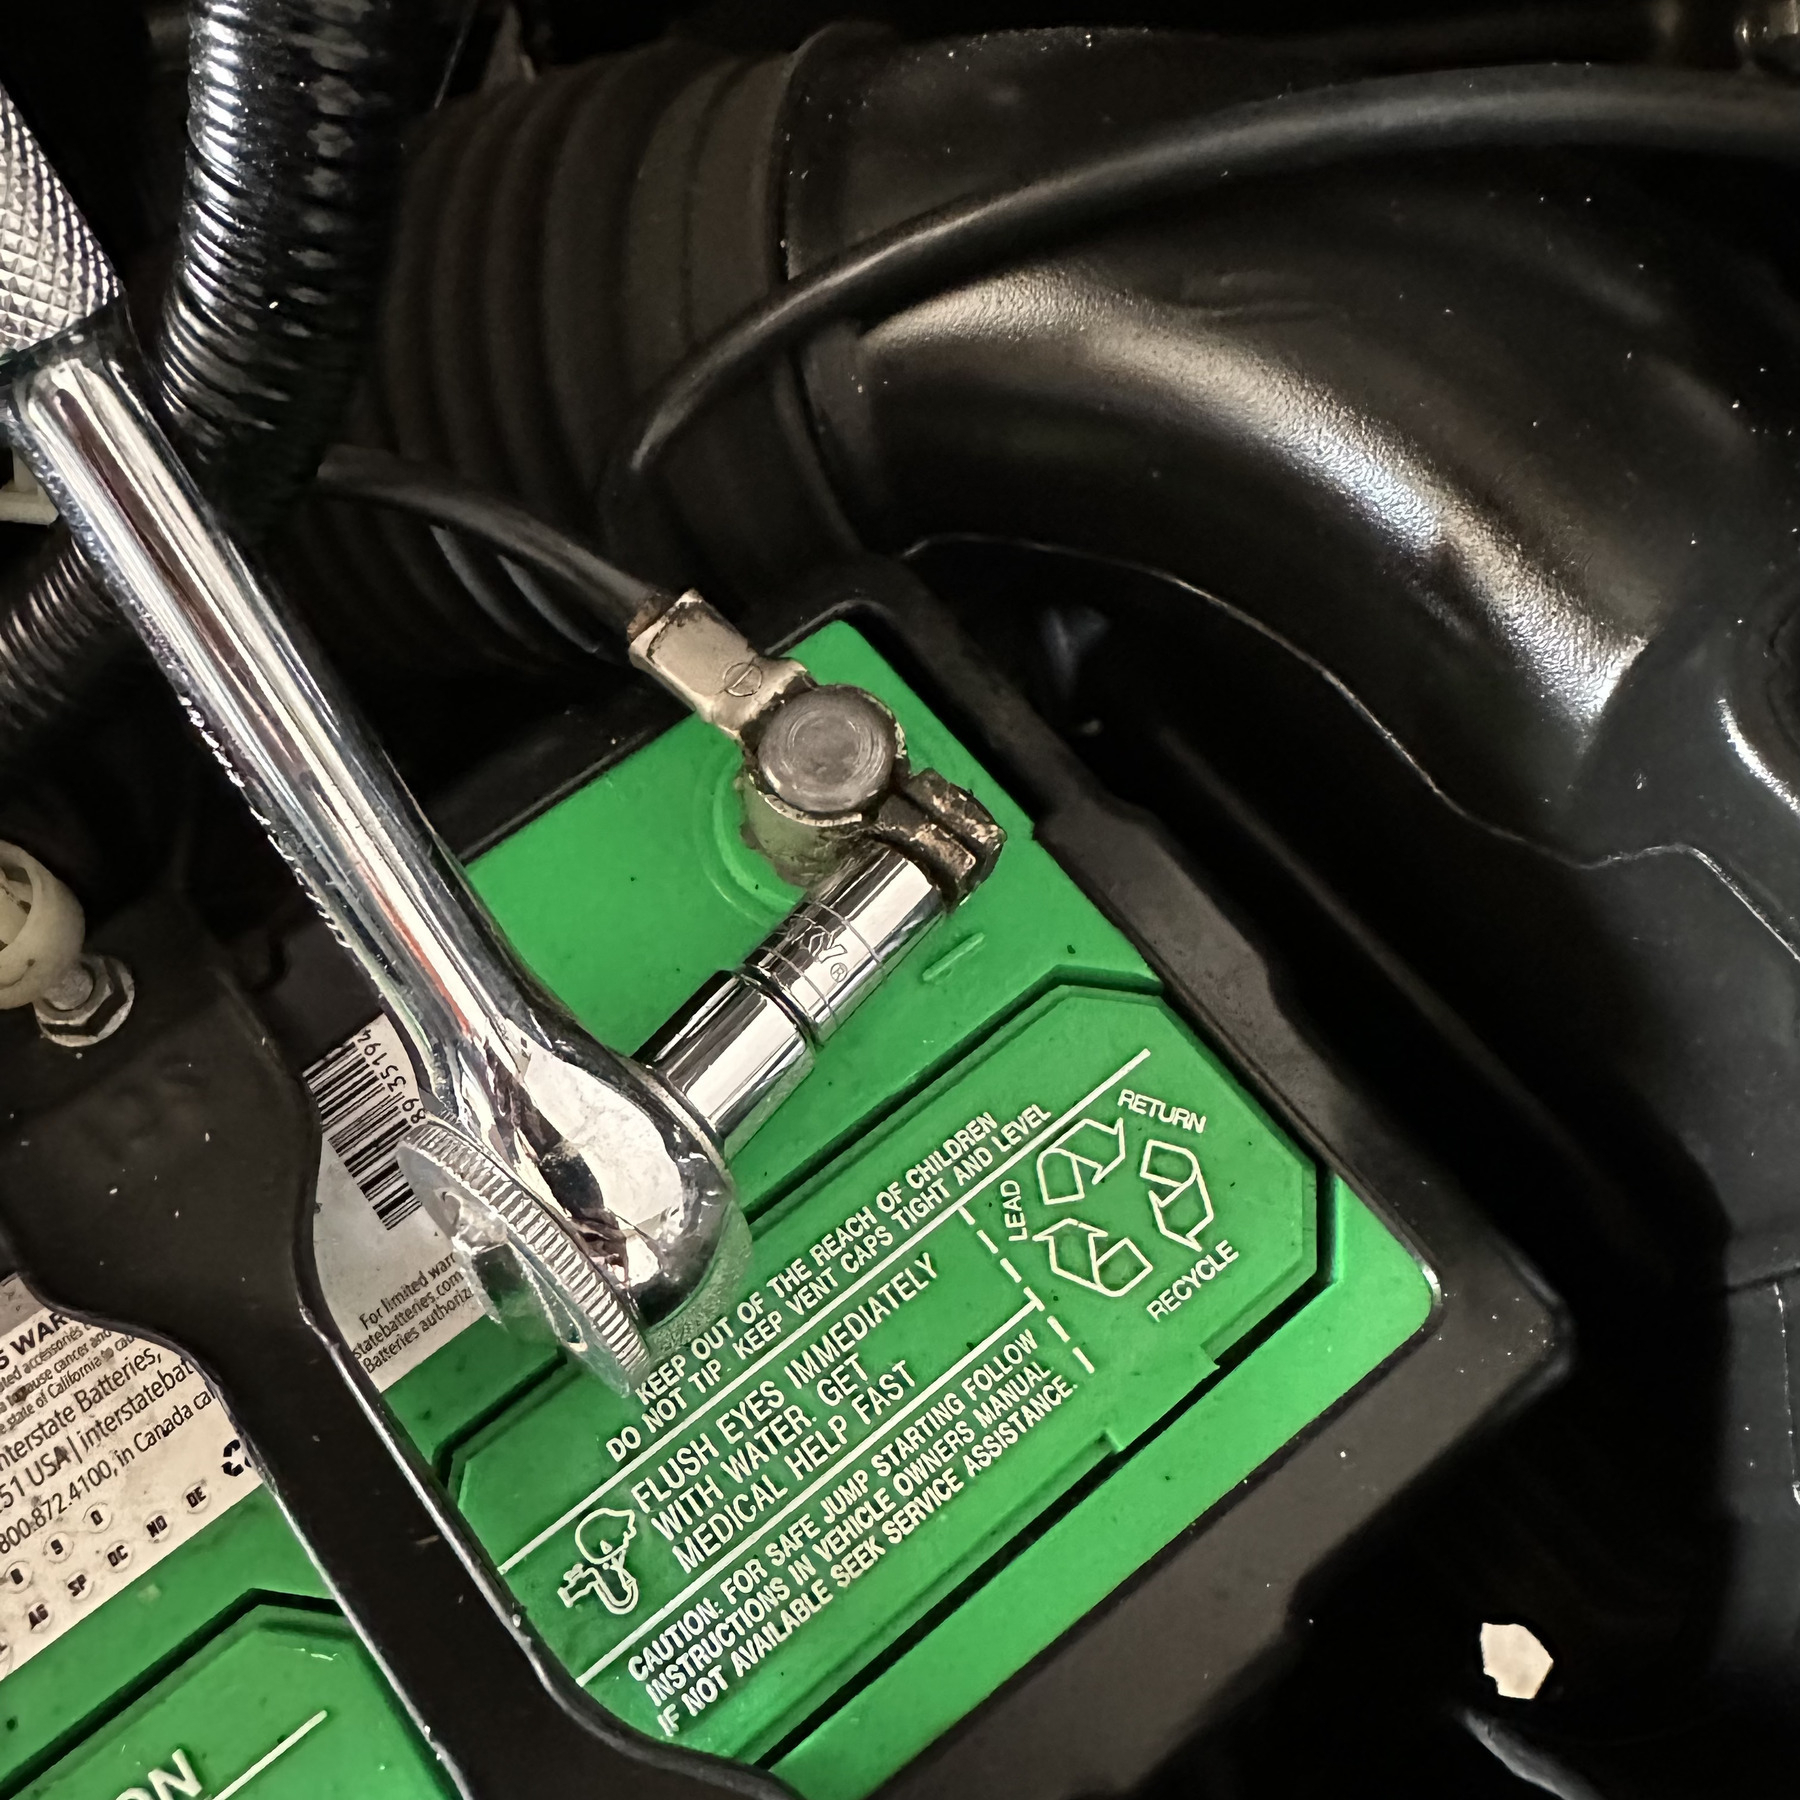
First step, disconnect the negative on the battery. Finding the right socket wrench in our garage took nearly as long as anything else.
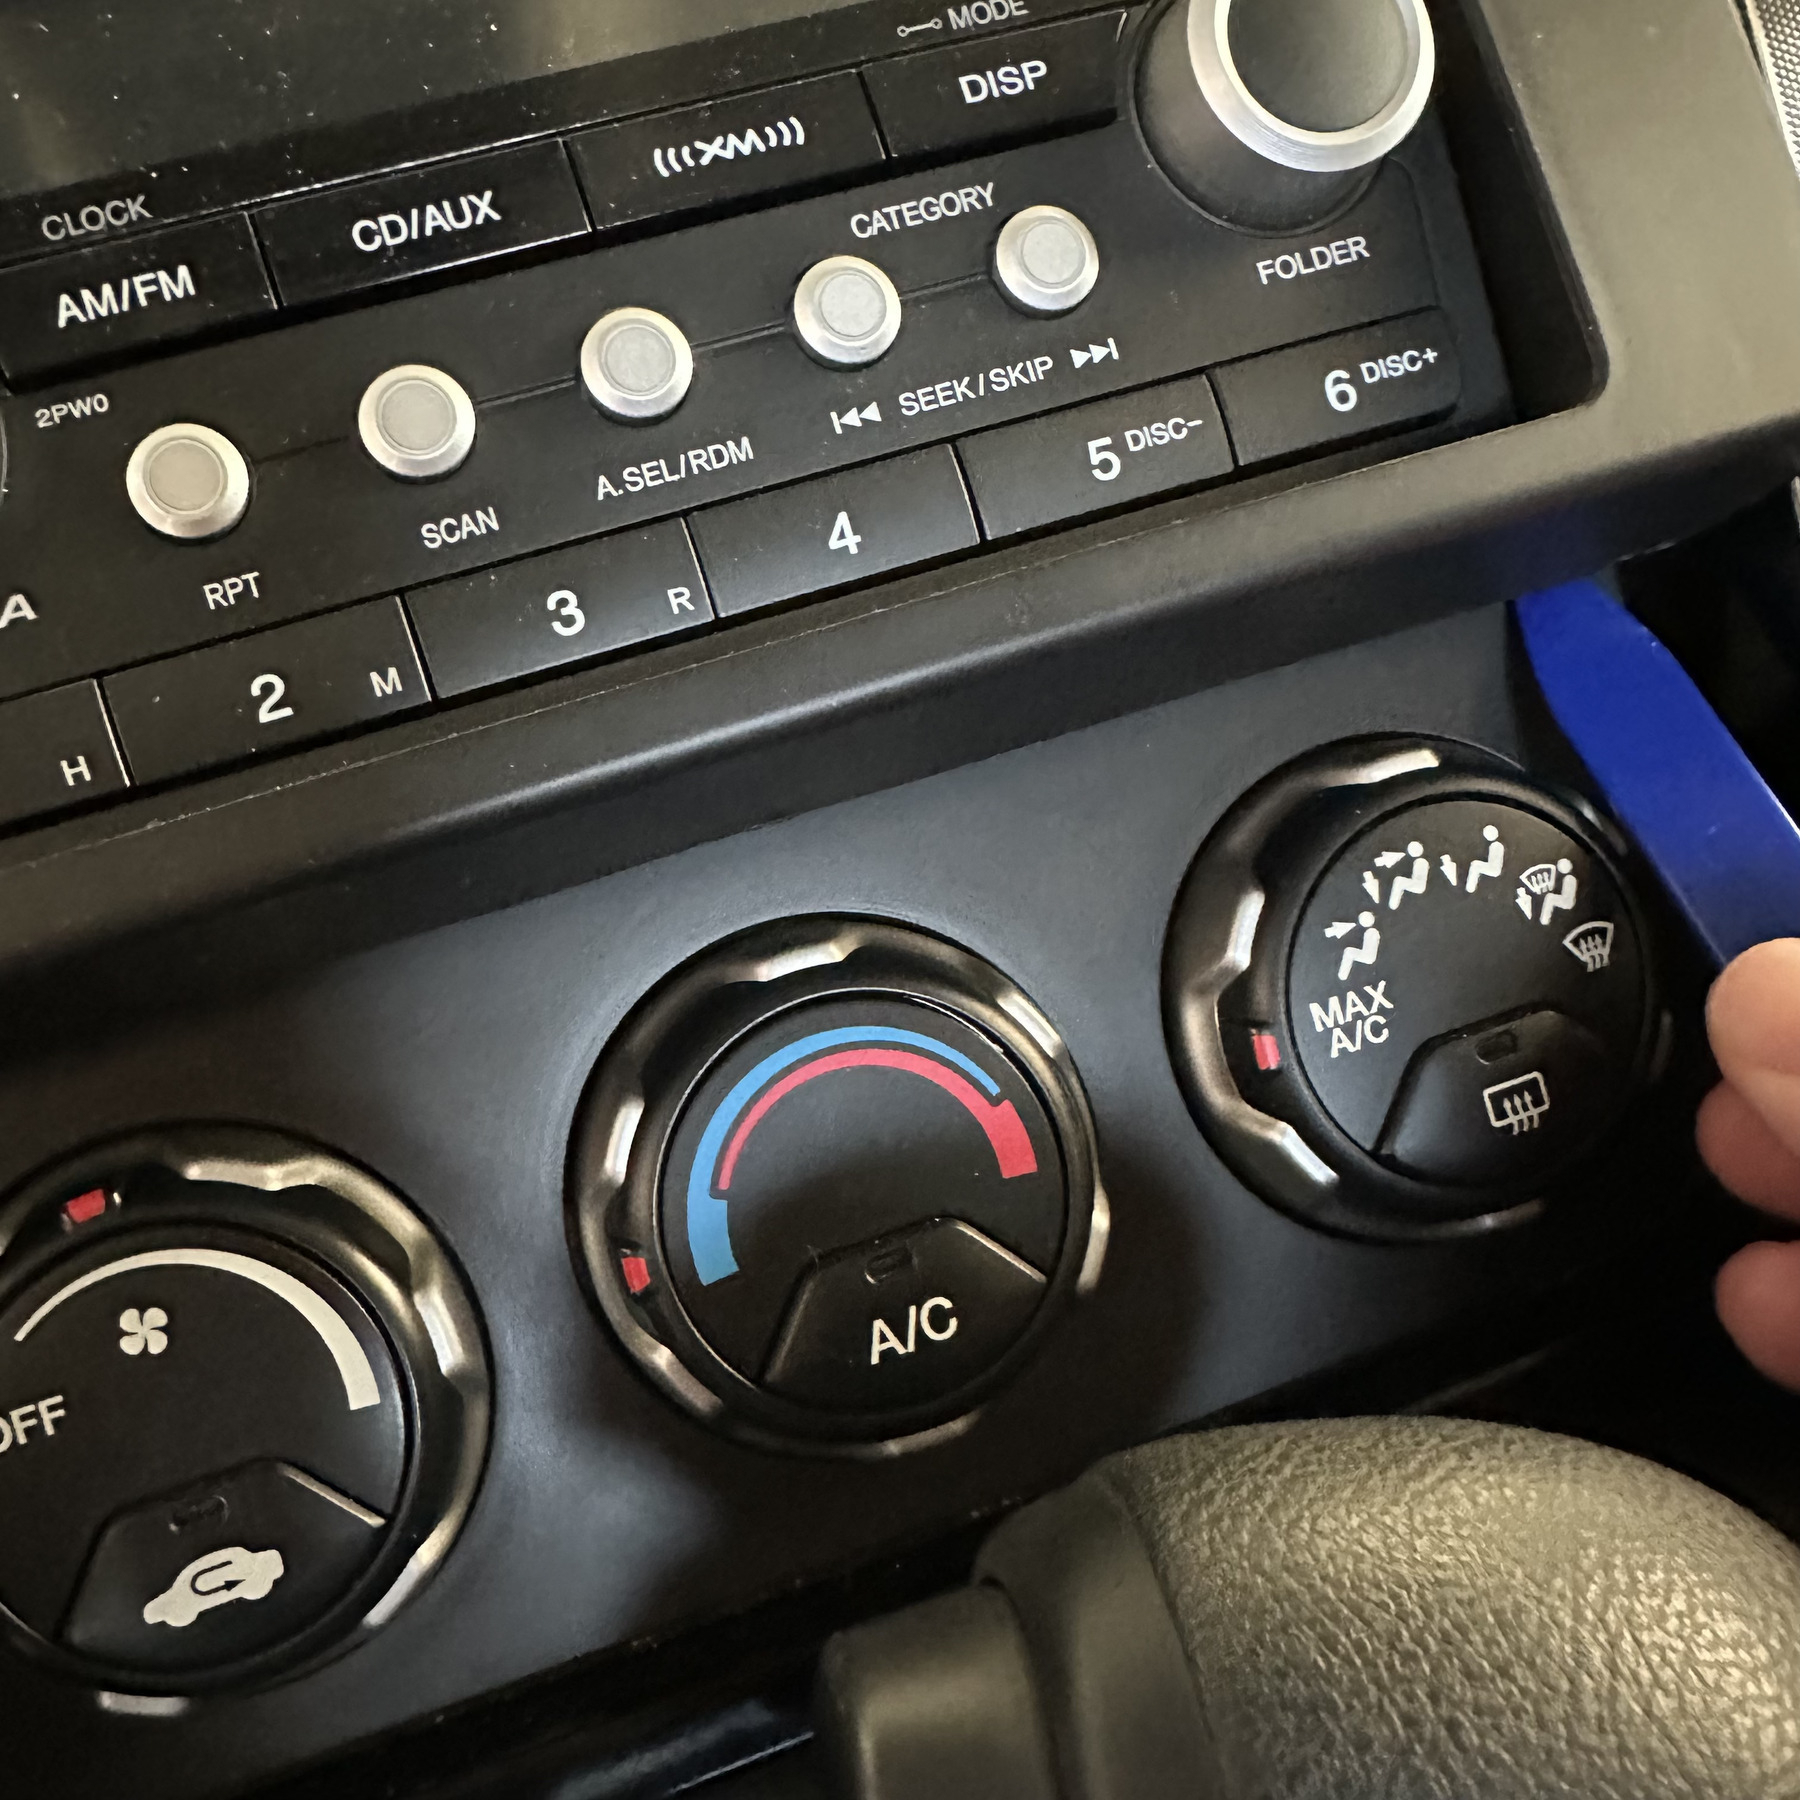
With a little plastic removal tool, I popped up the faceplate around the radio. After that it’s easy to unscrew the old unit and take it out.
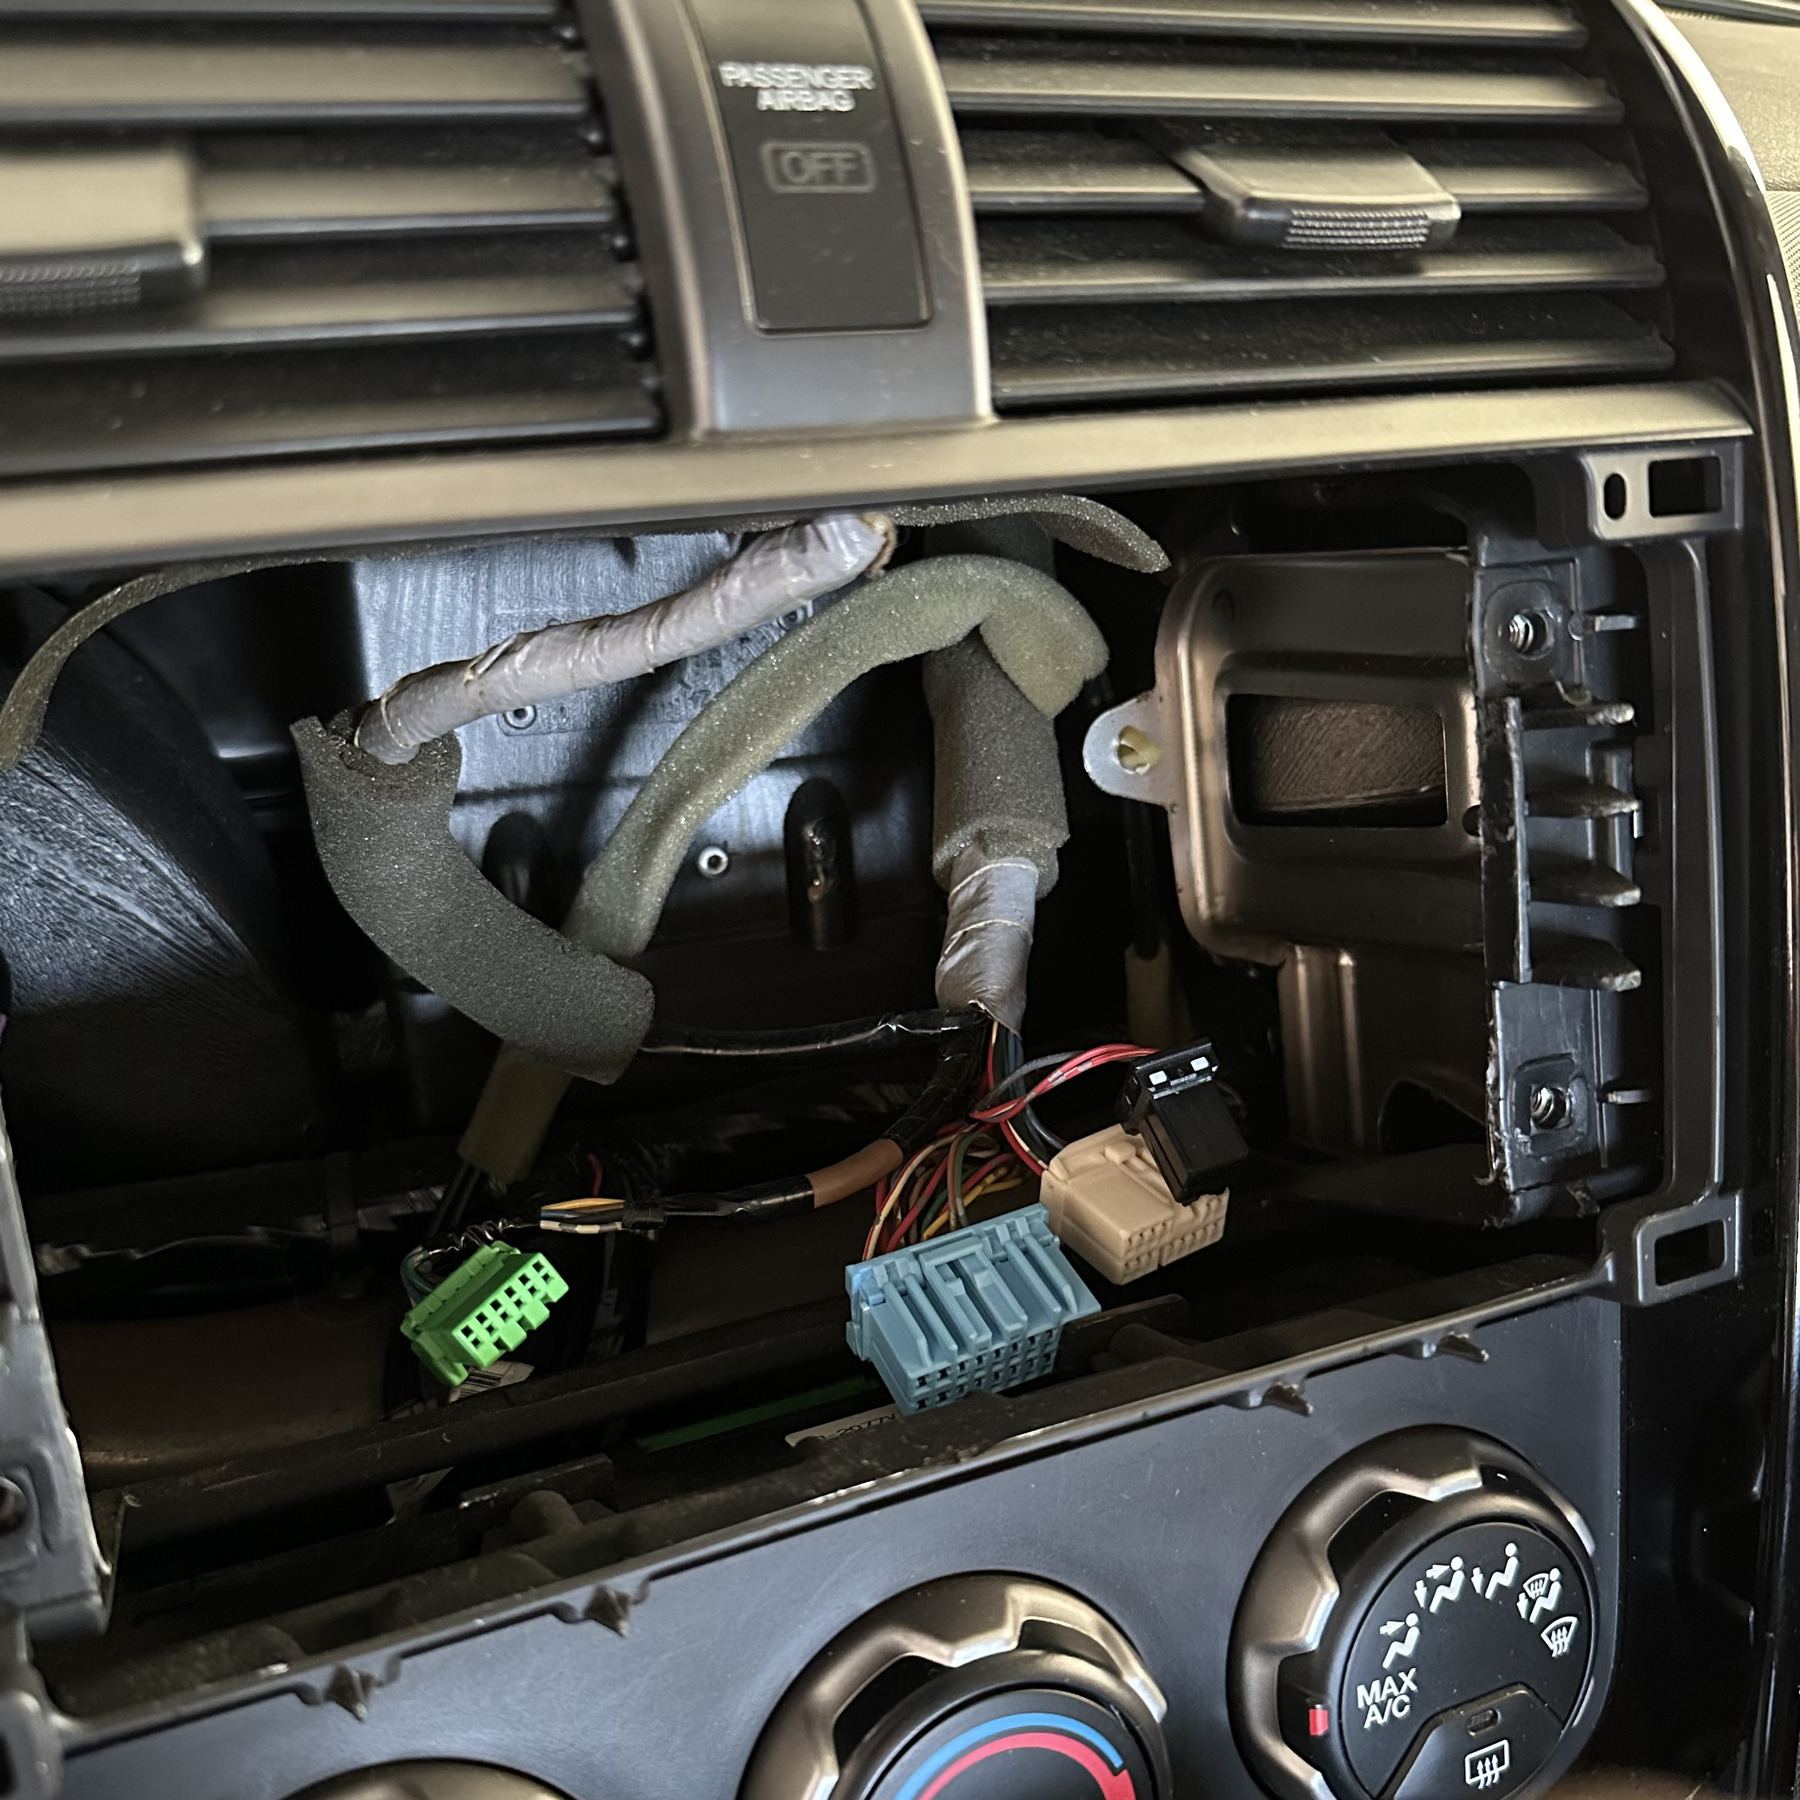
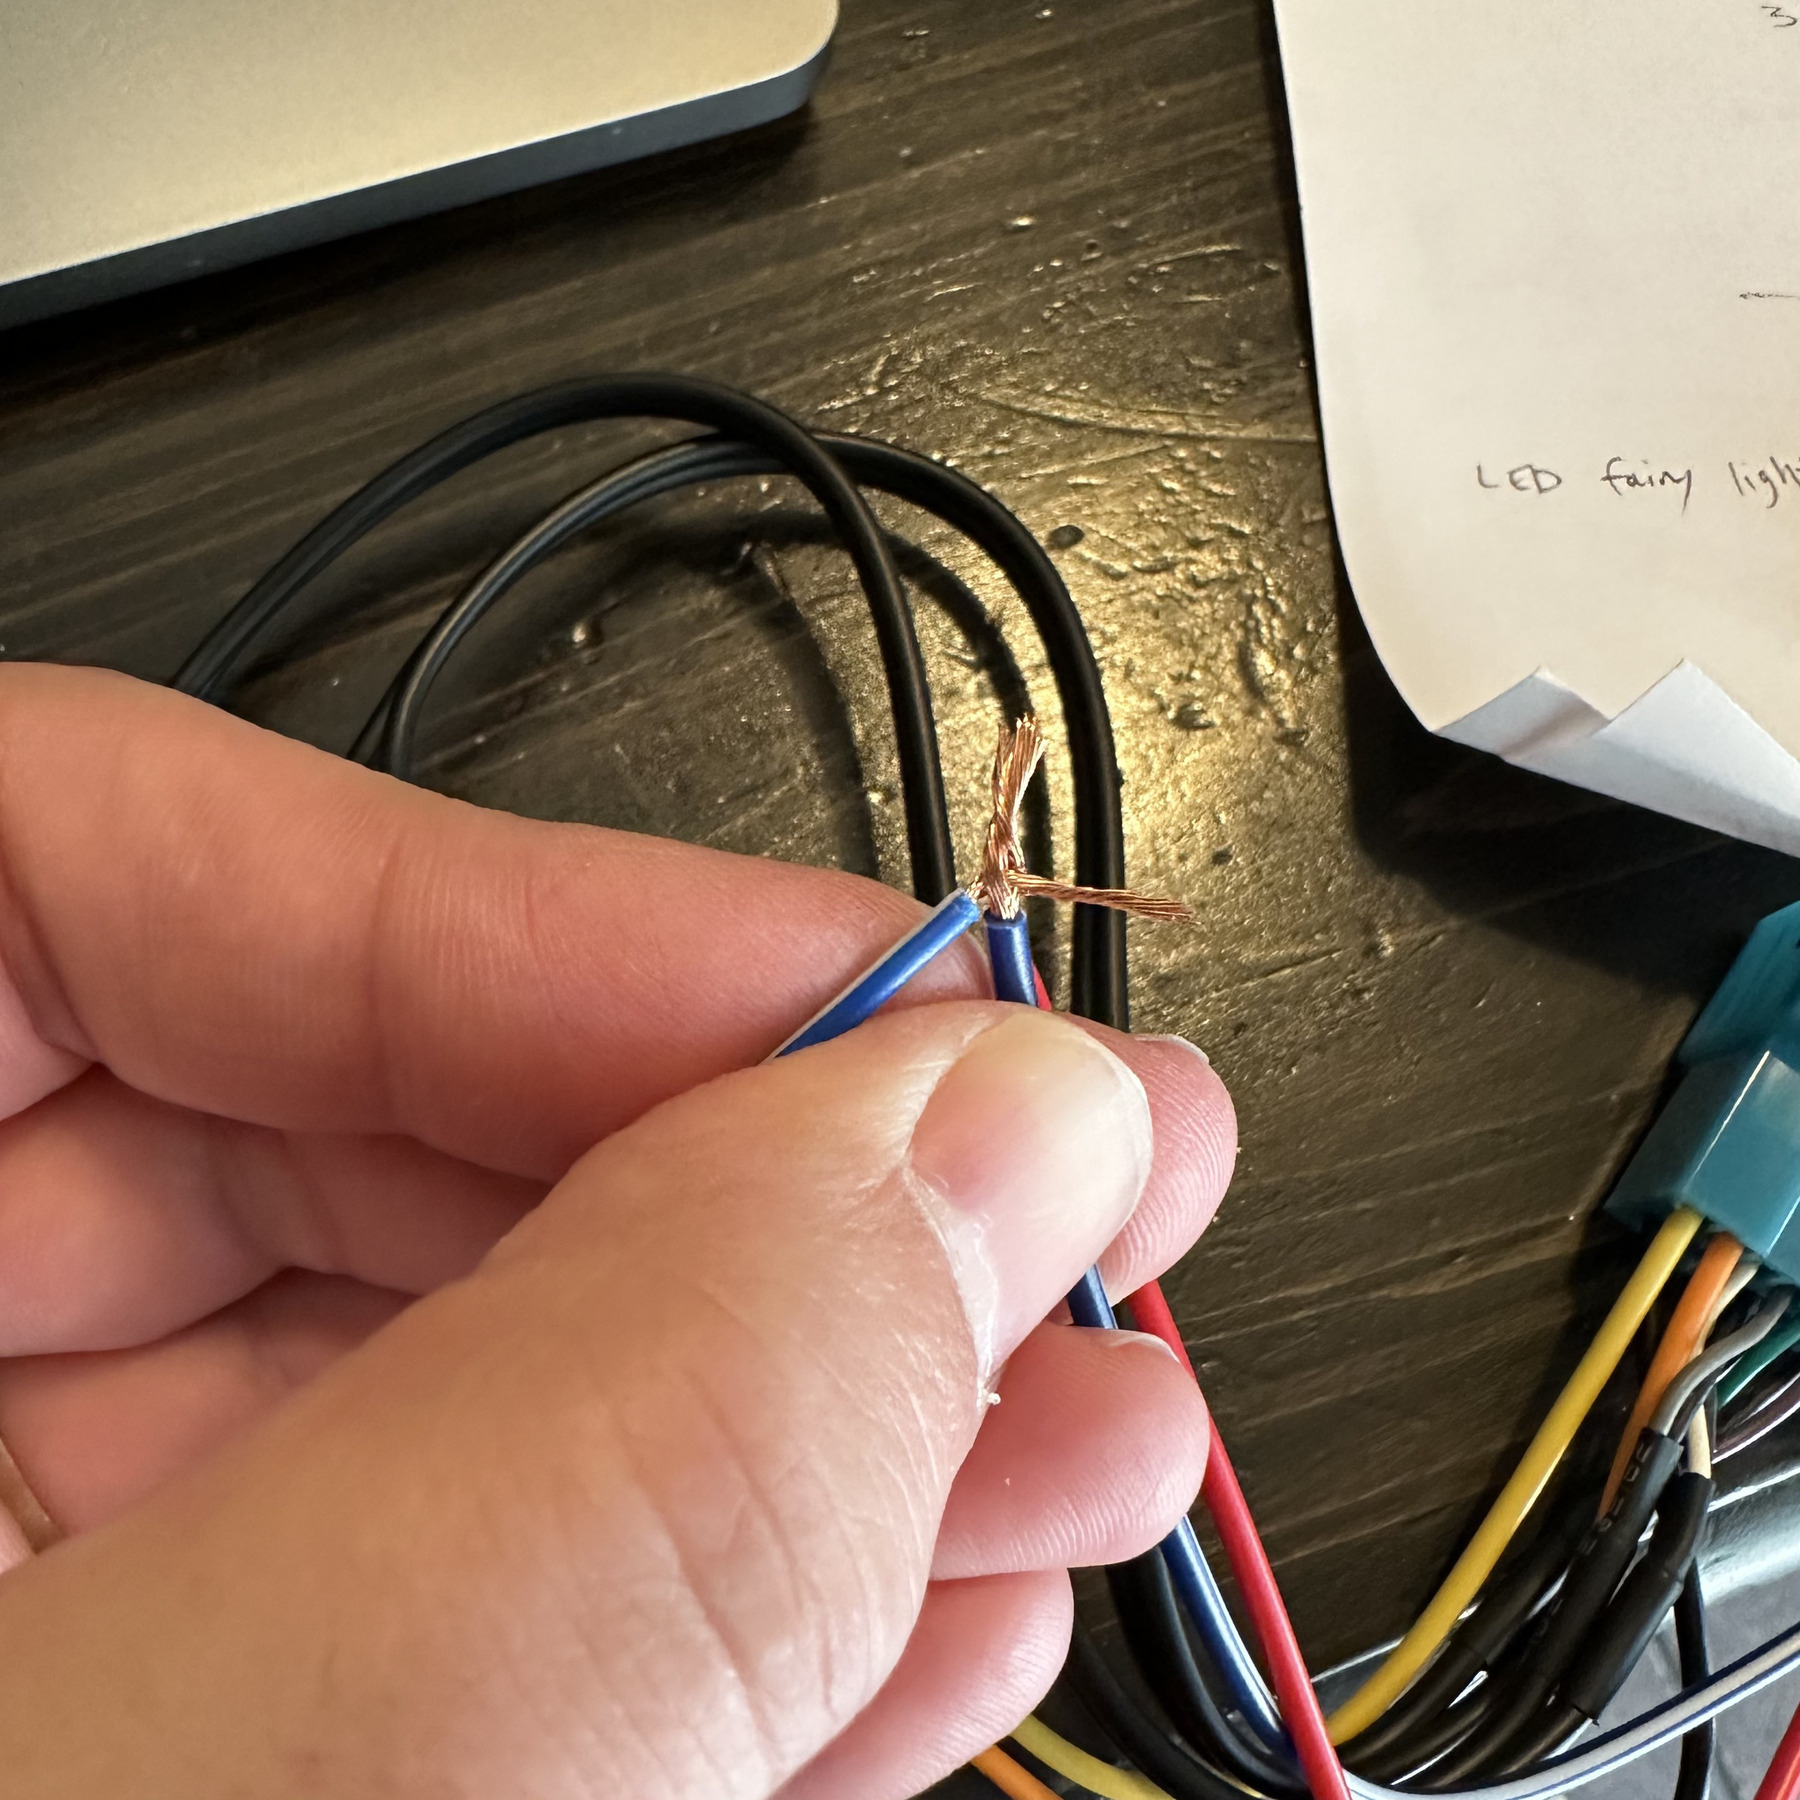
I stripped the wires on the new Sony unit and connected them to the appropriate wires on the Metra wiring harness. I didn’t have any fancy wire connectors so just threaded them together, twisted them, and wrapped in electrical tape. I went very slowly and think it turned out fine.
Finally, all that was left was to install the unit. I screwed everything in and popped on the new plastic covering. Some of the original wires from the car weren’t used so they are just dangling hidden inside. Hopefully they weren’t too important!
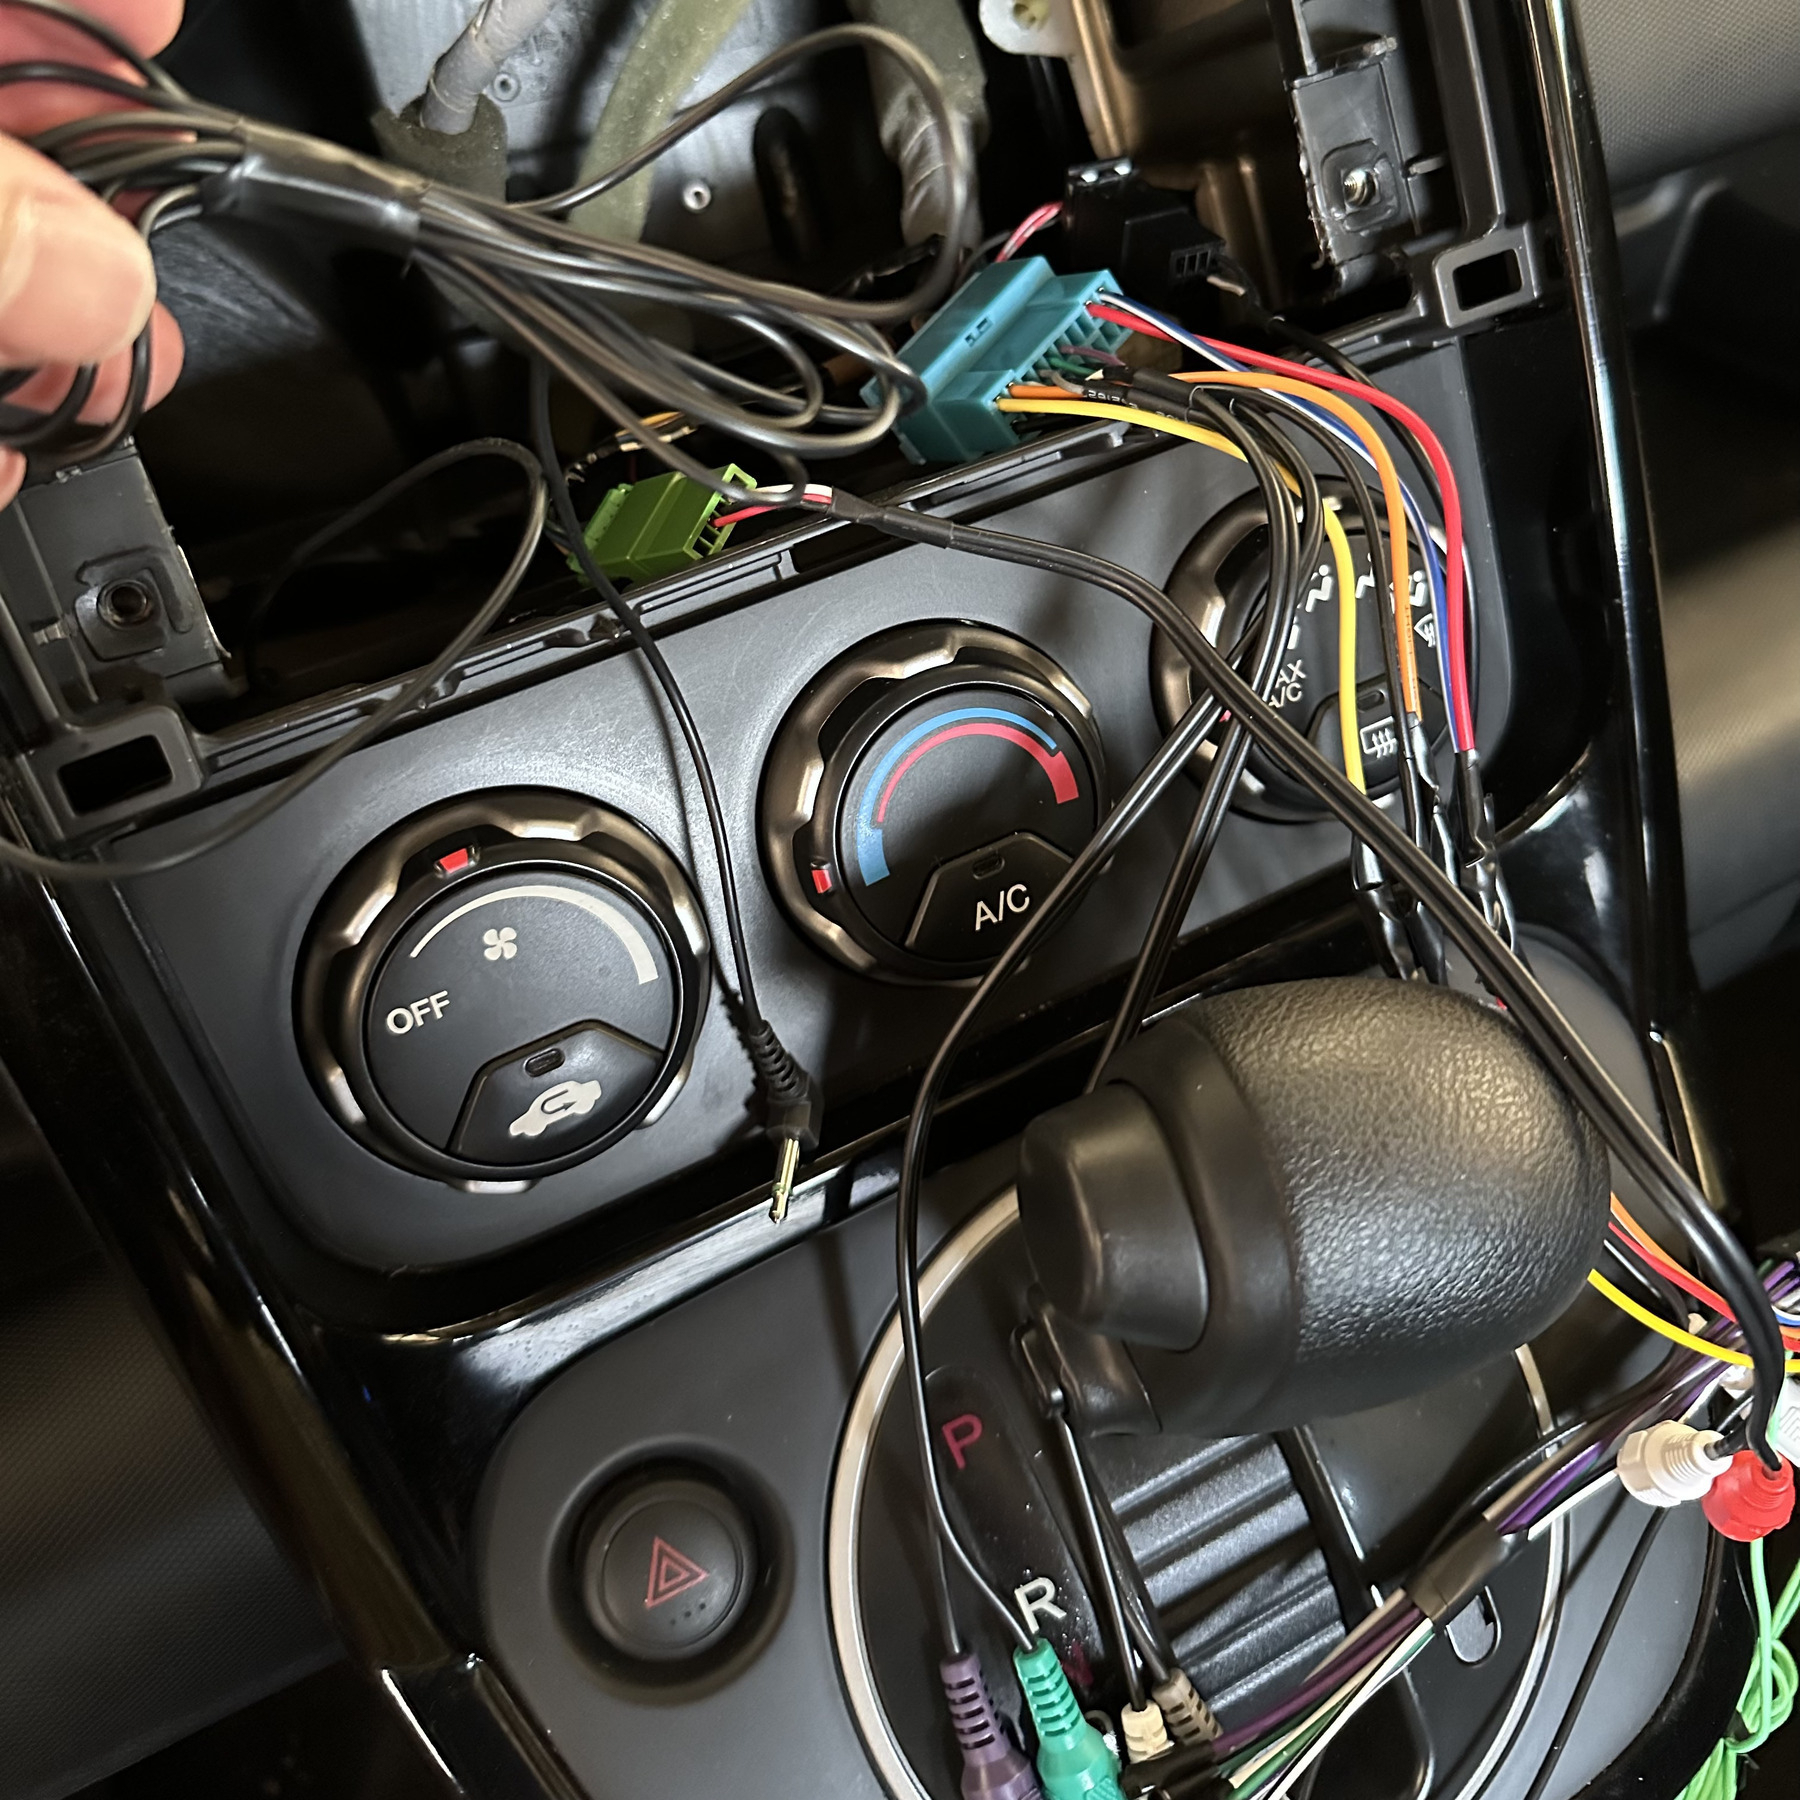
I also fed the microphone wire down to the floor so it can attach on the dashboard or behind the steering wheel. Haven’t totally figured out the best place for it yet.
Very happy with this upgrade overall. I probably should’ve had a professional do it, but I learned a lot. My car feels like it belongs in this decade now.